A Step-by-Step Guide to Repairing Cracks in Precast Concrete Panels
A Step-by-Step Guide to Repairing Cracks in Precast Concrete Panels
Introduction:
Cracks in precast concrete panels are a common issue that can compromise the structural integrity and aesthetics of a building if left untreated. Fortunately, repairing cracks in precast concrete panels is a manageable task with the right techniques and materials. In this blog post, we’ll provide a step-by-step guide to effectively repairing cracks in precast concrete panels, ensuring the durability and longevity of your building.
Step 1: Assessment and Preparation
Before starting the repair process, thoroughly assess the extent and severity of the cracks in the precast concrete panels. Use a hammer and chisel to widen and clean out the crack, removing any loose debris, dirt, or contaminants. This will create a clean and stable surface for the repair material to adhere to.
Step 2: Choose the Right Repair Material
Selecting the appropriate repair material is crucial for ensuring a successful repair. For small, hairline cracks, epoxy injection is often the preferred method, as it provides excellent bonding strength and durability. For larger cracks or areas of spalling, choose a high-quality repair mortar or patching compound specifically designed for repairing concrete surfaces.
Step 3: Apply Primer (if necessary)
In some cases, applying a primer to the cleaned crack surface can enhance adhesion and bonding strength between the repair material and the precast concrete panel. Follow the manufacturer’s instructions for the primer application and allow it to dry completely before proceeding with the repair.
Step 4: Epoxy Injection (for Hairline Cracks)
For hairline cracks, epoxy injection is an effective repair technique that involves injecting epoxy resin into the crack under pressure. Start by sealing the ends of the crack with epoxy paste or adhesive to prevent resin leakage. Then, inject the epoxy resin into the crack using a low-pressure injection system, ensuring that the entire crack is filled.
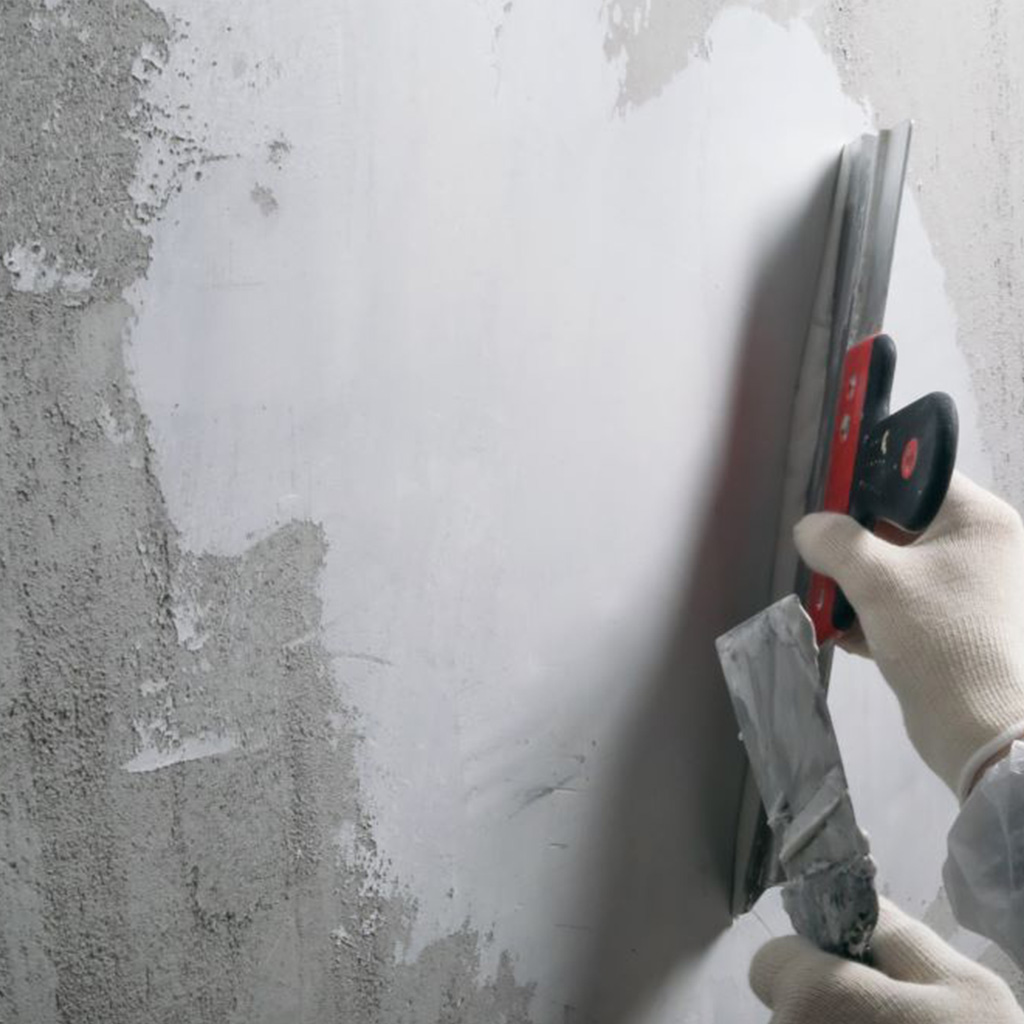
Step 5: Apply Repair Mortar or Patching Compound
For larger cracks or areas of spalling, mix the repair mortar or patching compound according to the manufacturer’s instructions. Using a trowel or putty knife, carefully apply the repair material to the cleaned crack surface, pressing it firmly into place and smoothing out any excess material. Work in small sections, gradually building up the repair material until the crack is completely filled and the surface is level with the surrounding area.
Step 6: Finishing Touches
Once the repair material has cured completely, typically within 24-48 hours, inspect the repaired area for any imperfections or rough spots. Use sandpaper or a rubbing stone to smooth out any rough edges or uneven surfaces, blending the repaired area seamlessly with the surrounding precast concrete panel.
Conclusion:
Repairing cracks in precast concrete panels is a straightforward process that can be accomplished with the right materials and techniques. By following this step-by-step guide and taking the time to properly assess, prepare, and apply the repair material, you can effectively restore the structural integrity and aesthetics of your precast concrete panels, ensuring the longevity and durability of your building.
Our Services
- Site map
Contact Details
- Phone Number
0428 954 378
- Email Address
ryan@civcompatchandcaulk.com.au
- Location
Sydney, New South Wales, Australia.
© 2024 All rights reserved by Civcom Patch & Caulk | ABN: 15 618 009 162